How to Remove Dog Hair From Car Seats and Carpet Without Damaging Your Interior
If you regularly travel with your dog, you probably know how quickly a clean car can become covered in fur.
You vacuum the seats, clean the floor mats and run the vacuum over the boot. But no matter how many times you go over the carpet, some hairs refuse to move.
The problem is that dog hair doesn’t always sit on top of the fabric. It can become trapped between the fibres of your car seats and carpet, making it difficult to remove with suction alone.
The good news? You don’t necessarily need expensive equipment or a professional detailer to tackle everyday pet hair.
In this guide, we’ll explain how to remove dog hair from car seats, carpets and boot liners, which tools actually help, and what to avoid if you don’t want to damage your interior.
What Is the Best Way to Remove Dog Hair From a Car?
The most effective approach for most fabric interiors is to remove loose hair with a vacuum, use a rubber glove or pet-hair brush to lift the embedded strands, then vacuum the area again.
Here’s the process:
Remove loose items, seat covers and floor mats.
Vacuum loose fur, dirt and debris.
Use a slightly damp rubber glove or rubber brush to loosen trapped hair.
Gather the hair into small clumps.
Vacuum the loosened hair and clean the seams.
Repeat on stubborn areas using a suitable tool.
This combination works because the rubber provides friction that helps lift fur from the upholstery. Vacuuming then removes the hair rather than simply passing over it.
Why Is Dog Hair So Difficult to Remove From Car Seats?
Car upholstery and carpet are designed to withstand regular use. Unfortunately, their textured surfaces can also trap pet hair.
When your dog sits, moves or lies on the seats, loose hair can become pressed into the fabric.
Three things make removal particularly difficult.
Fabric fibres: Short, stiff hairs can become lodged between the fibres of your seats and carpet.
Static electricity: Static can make hair cling to fabric surfaces instead of lifting away easily.
Repeated use: Sitting on already-covered seats or walking on carpeted areas can press fur further into the material.
This explains why a car can still look covered in hair even after a thorough vacuum.
The American Kennel Club discusses how static electricity and the structure of dog hair contribute to its tendency to cling to fabric in its guide to removing dog hair .
How to Remove Dog Hair From Fabric Car Seats
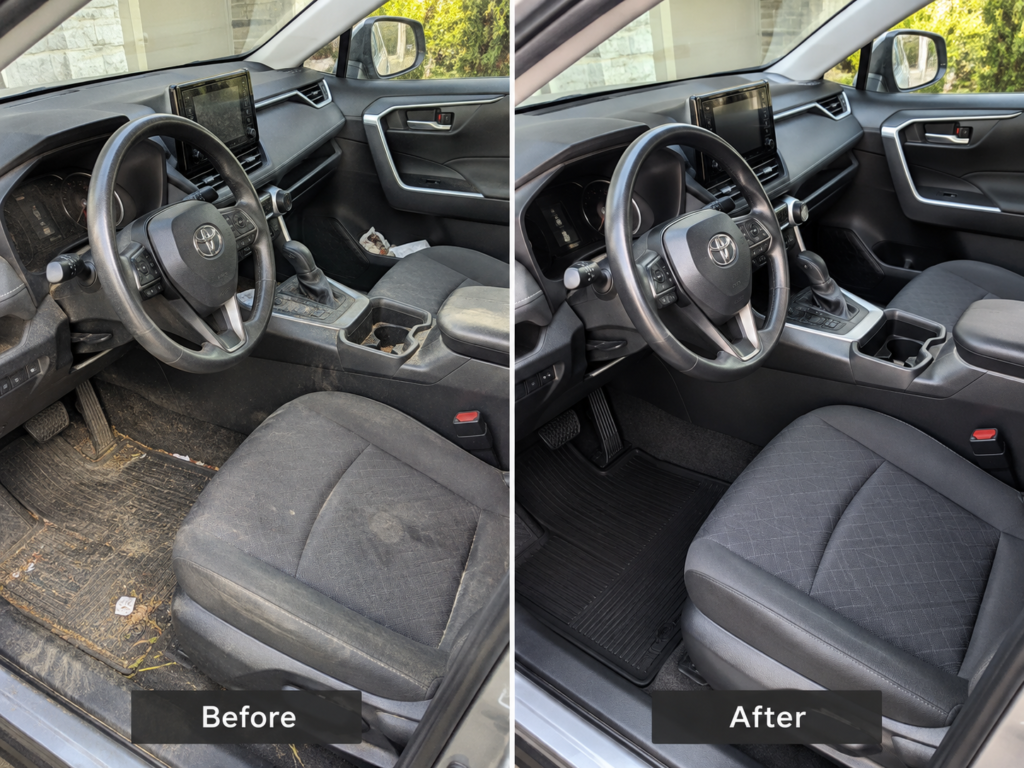
Fabric seats often require more attention than leather or vinyl because loose fur can become embedded in the weave.
Try this method before using stronger cleaning products or aggressive brushes.
Step 1: Start with a thorough vacuum
Remove any loose items from the seats and clear the footwells.
Use an upholstery attachment to vacuum the seat cushions, backrests and headrests.
Pay particular attention to the area where the seat base meets the backrest. This is where loose hair can collect and remain hidden.
A vacuum with a crevice attachment is especially useful for these narrow areas.
Don’t worry if some hair remains. At this stage, you’re removing loose debris and making the embedded hair easier to work on.
Step 2: Use a rubber glove
One of the simplest pet hair removal tools is an ordinary rubber cleaning glove.
Put the glove on and lightly dampen it with water. It should be slightly moist, not dripping wet.
Run your hand across a small section of the fabric using short, controlled strokes.
You’ll notice the loose hair beginning to gather into small clumps.
Pick up the clumps and continue working across the seat.
For stubborn areas, try moving your hand in another direction, but avoid applying excessive pressure.
Tip: Test the glove on a small, less visible area first. Different fabrics can react differently to friction.
Step 3: Try a rubber pet-hair brush
If the glove doesn’t remove everything, a purpose-made rubber pet-hair brush can help.
Work in small sections rather than trying to clean the entire seat at once.
Use light, deliberate strokes to gather the remaining fur.
Avoid aggressively scrubbing the upholstery. Your goal is to lift the hair, not disturb or damage the fabric.
Step 4: Vacuum again
Once you’ve loosened the embedded hair, vacuum the seat a second time.
Use the crevice tool around the seat edges and seams.
For a final clean, a lint roller may help remove individual hairs left on the surface.
You should now have removed a substantial amount of the fur without needing to soak the seats or use strong chemicals.
How to Get Dog Hair Out of Car Carpet and Floor Mats
Car carpet can be more challenging than seat upholstery, particularly when the hair has been pressed into the fibres over time.
Start by removing the floor mats from the vehicle.
Shake them outside to remove loose dirt, sand and fur.
For carpeted mats, use a rubber brush to work the remaining hair towards one edge. Vacuum the collected hair and repeat where necessary.
For fixed carpet, work from the front footwells towards the rear of the vehicle. Use the same rubber-brush and vacuuming method on each section.
The boot deserves particular attention if your dog regularly travels there. Check the carpeted side panels and the edges of any removable boot liner.
Be careful with pet-hair removal stones. Some abrasive stones are marketed specifically for vehicle carpet, but they can also damage the pile if used too aggressively.
If you decide to use one, follow the product’s instructions and test it on an inconspicuous section of compatible carpet first. Avoid using it on delicate upholstery, leather, vinyl or suede-like materials.
Shell Australia also cautions that vigorous hair removal can damage carpet fibres.
Can You Remove Dog Hair From Leather Car Seats?
Yes. Leather and vinyl seats are generally easier to remove surface hair from because they don’t trap fur in the same way as woven fabric.
Start with a soft microfibre cloth to gather loose hair.
Then use a vacuum with a suitable soft attachment around the seat seams and edges.
If the seats need further cleaning, use a product specifically recommended for their material and follow the vehicle manufacturer’s care instructions.
Avoid abrasive brushes, harsh household chemicals and excessive moisture.
Also remember that a leather seat may have fabric sections, perforations or delicate finishes that require different care.
When in doubt, use a gentle method rather than risking damage to the seat.
What Should You Avoid When Removing Pet Hair?
It can be tempting to use whatever removes hair the fastest, but the wrong tool can leave permanent damage.
Here are five mistakes worth avoiding.
1. Scrubbing too hard
Aggressive brushing can disturb the upholstery fibres, cause pilling or damage delicate materials.
2. Soaking the seats
You don’t need to saturate your upholstery to remove fur. Excess water can take a long time to dry, especially if it reaches the seat padding.
3. Using a wire brush or sharp scraper
Avoid using household wire brushes or metal scrapers on car upholstery. They can snag and damage fabric.
4. Using random household chemicals
Fabric softeners and other household products are sometimes suggested online, but they may not be suitable for every automotive material. Start with a dry or lightly dampened rubber tool instead.
5. Forgetting the hidden areas
Even after the visible seats look clean, check underneath them, along the rails, in the boot and around the seatbelt anchoring points.
When cleaning near electrical components or seat mechanisms, avoid disturbing wiring and use an appropriate vacuum attachment.
How Often Should You Clean Dog Hair From Your Car?
There isn’t one cleaning schedule that works for every dog owner.
A dog that sheds heavily and travels every day will create a different level of buildup from one that occasionally rides in the car.
As a practical starting point:
After each trip, remove obvious fur and shake out the removable seat cover.
Once a week, vacuum the areas where your dog regularly sits.
Periodically, check the carpets, boot and seat seams for embedded hair.
Regular maintenance is usually easier than waiting until the entire interior needs extensive cleaning.
The American Kennel Club also recommends regular grooming and using pet-specific seat covers to reduce the amount of hair that accumulates in a vehicle.
When Is Professional Pet Hair Removal Worth It?
You can remove a lot of everyday pet hair yourself, particularly when you clean your vehicle regularly.
However, some situations may require more time and specialised equipment.
Consider professional interior detailing if:
Hair remains deeply embedded after repeated brushing and vacuuming.
The boot, carpets and rear seats have heavy buildup.
You’re preparing the vehicle for sale.
You don’t have the equipment or time for a thorough interior clean.
You’re also dealing with stains, dirt or unpleasant odours.
Professional detailing can help tackle difficult areas using appropriate tools and techniques.
However, it’s worth asking what is included before booking. Heavy pet hair removal may require additional time and may not be included in every standard detailing package.
If your car also smells unpleasant after cleaning, read our guide, Why Does My Car Still Smell Bad After Cleaning? Causes, Fixes and When to Get Help, to understand why removing visible hair may not solve the underlying problem.
How to Prevent Dog Hair From Building Up in Your Car
Removing pet hair is one thing. Keeping it under control is another.
You don’t need to stop taking your dog on car trips, but a few changes can make the cleaning process much easier.
Use a removable seat cover
A washable pet seat cover helps contain loose fur and protects the upholstery underneath.
Choose one that fits your vehicle and doesn’t obstruct seatbelts, child-restraint points or other safety equipment.
Follow the manufacturer’s instructions when fitting and washing it.
Brush your dog before travelling
Regular grooming helps remove loose hair before it ends up inside your car.
The appropriate brushing routine will depend on your dog’s coat.
Keep a small cleaning kit in the boot
A rubber glove, compact vacuum and microfibre cloth can help you tackle fur before it accumulates.
Clean the boot regularly
If your dog rides in the rear cargo area, use a suitable removable liner and vacuum the surrounding carpet.
Regularly inspect the edges, side panels and areas underneath the liner.
These small habits won’t completely prevent shedding, but they can make maintaining a clean interior considerably easier.
Frequently Asked Questions
What is the easiest way to remove dog hair from car seats?
For most fabric seats, start with a vacuum to remove loose fur. Then use a slightly damp rubber glove or rubber pet-hair brush to gather embedded hair before vacuuming again.
Why won’t my vacuum pick up dog hair?
Dog hair can become trapped between upholstery and carpet fibres. Static electricity can also make it cling to the material. A rubber brush can help loosen the hair so the vacuum can collect it.
Can I use a lint roller to remove pet hair from my car?
Yes. A lint roller can remove loose surface hair and is useful for finishing small areas. However, it may be less practical for large amounts of deeply embedded fur.
Can dog hair damage car seats?
Dog hair itself isn’t usually the main concern. However, aggressive removal techniques can damage upholstery. Use tools suitable for the material and avoid excessive pressure.
Does steam cleaning remove dog hair?
Steam cleaning is not a substitute for physically removing pet hair. It’s generally better to remove the fur with suitable brushes and vacuuming before considering any wet cleaning. Whether steam is appropriate depends on the seat material and manufacturer’s guidance.
Can car detailing remove all dog hair?
A thorough interior detail can remove substantial amounts of embedded hair, but complete removal cannot always be guaranteed. Results depend on the upholstery, amount of buildup and accessibility of the affected areas.
Where can I get professional interior car detailing in Sydney?
Rear Biased provides car detailing services in Sydney. If you’re dealing with stubborn pet hair, send us photos of your car’s interior and let us know which areas need attention so we can discuss the appropriate service.
Need Help Cleaning Your Car’s Interior in Sydney?
Sometimes, regular vacuuming just isn’t enough.
Whether your car needs a thorough interior clean, attention to heavily used carpets or a complete refresh, Rear Biased can help you explore your detailing options.
Tell us about your vehicle, the condition of its interior and any particular concerns before booking. We’ll discuss the work required and confirm the scope of your detail.
Why Does My Car Still Smell Bad After Cleaning? Causes, Fixes and When to Get Help
You vacuum the seats, wipe down the dashboard, put in a new air freshener and think the car is finally clean. A few days later, the smell returns.
It might be a damp, musty smell when you open the door. It could be an old food spill, wet dog, cigarette smoke or an unpleasant odour coming through the air-conditioning vents.
The problem is that a clean-looking car doesn’t necessarily mean the source of the smell has been removed.
Odours can remain in seat fabric, carpet, floor mats and other hard-to-reach areas. Sometimes, the issue isn’t dirt at all. A water leak or a problem with the car’s ventilation system may be responsible.
Here’s how to work out where the smell is coming from, what you can safely do yourself and when professional help makes sense.
1. Find the source of the smell before cleaning anything
Before buying another cleaning product, spend a few minutes investigating the car.
Remove loose items and rubbish, then check:
Under the front and rear seats, including the seat rails.
Beneath removable floor mats, particularly in the footwells.
The boot, spare-wheel compartment and any storage areas.
Cup holders, door pockets and the spaces around child seats.
Carpet and upholstery where drinks or food have previously spilled.
Pay attention to when the smell is strongest.
If you notice it as soon as you open the door, check the interior first. If it appears mainly when the air conditioning starts, the ventilation system may need attention.
If it gets worse after rain, inspect the carpet and boot for moisture.
Different smells call for different approaches. Here’s where to start.
Musty or damp smell
A musty smell can indicate trapped moisture, particularly when the carpet or upholstery has been wet.
Check beneath the mats, around the boot seals and in areas where water may have entered through an open window or a damaged seal.
If the car smells worse after rain or the carpet remains damp, arrange an inspection for possible water ingress.
Cleaning the surface won’t solve an active leak.
Sour milk or old food smell
Milk, coffee and other drinks can soak through fabric and into the padding beneath it.
You might remove the visible stain while leaving residue further down.
Try to identify the original spill location. If the smell persists after an appropriate upholstery clean, deeper cleaning may be needed.
Wet dog or pet smell
Pet hair, dirt and moisture collect in fabric seats, carpet and boot liners.
Start by removing pet blankets and seat covers. Thoroughly vacuum the areas where your pet usually sits.
If there has been a pet accident, choose an upholstery-safe product designed for that type of contamination. Always test it on an inconspicuous area and follow the label.
Cigarette smoke smell
Smoke residue can settle on multiple interior surfaces, including the headlining, seats, carpets and other trim.
Cleaning only the seats may not be enough.
A more comprehensive interior clean can help, but a heavily smoke-contaminated vehicle may need specialist treatment. Complete odour removal cannot always be guaranteed.
Musty smell from the air conditioning
If the smell is most noticeable when you switch on the fan or air conditioning, consider the cabin air filter or the air-conditioning system itself.
Moisture can remain around the air-conditioning evaporator. A dirty filter, drainage problem or contamination inside the system may contribute to the smell.
If the smell persists after a filter change, have the system inspected by a qualified automotive technician.
Important: Not every car smell is a detailing problem. Fuel, exhaust, burning or strong chemical smells can indicate mechanical or electrical faults. If you notice these, stop somewhere safe and seek appropriate assistance. A sweet smell may also indicate a coolant leak. Don’t attempt to cover up these smells with an air freshener.
3. How to remove common car interior smells at home
For ordinary food, dirt and general-use odours, a careful interior clean is a sensible starting point.
The following process helps you avoid spreading dirt or introducing unnecessary moisture.
Step 1: Remove rubbish and loose items
Empty the door pockets, cup holders, centre console and boot.
Take out removable floor mats. Remove anything that might be contributing to the smell, including old food, damp towels and pet accessories.
Step 2: Vacuum before using liquid cleaners
Thoroughly vacuum the seats, carpets, mats and accessible gaps.
Use a suitable crevice attachment around the seat rails and between the seats and centre console.
For pet hair, use an appropriate upholstery attachment or pet-hair removal tool.
Don’t start wet-cleaning while loose dirt is still sitting on the surface.
Step 3: Clean the affected material, not just the visible stain
Choose a cleaner suitable for the surface you’re treating.
For fabric seats and carpet, use an automotive upholstery product and follow the manufacturer’s instructions. Test a hidden section before treating a visible area.
For leather, use an approved leather cleaner and a soft microfibre cloth.
Avoid harsh household chemicals, aggressive scrubbing and soaking the seats.
A useful distinction: removing a stain isn’t always the same as removing its smell. If residue has reached the padding beneath the upholstery, surface cleaning may not be sufficient.
Once you’ve cleaned the interior, don’t immediately close the car with damp seats or carpets.
Allow cleaned surfaces to dry according to the product instructions. Ventilate the vehicle in a secure location when weather permits.
If you’re cleaning removable mats, dry them separately before returning them to the vehicle.
Avoid introducing excess water around seat wiring, electrical controls and other sensitive components.
Step 5: Recheck the smell
After the surfaces have dried, inspect the car again.
If the smell has disappeared, keep up regular cleaning and deal with future spills promptly.
If it remains, identify whether it is coming from a particular area, the ventilation system or moisture trapped beneath the visible surfaces.
Repeating the same treatment without identifying the problem may waste time and make an already damp interior worse.
4. Why does a car smell musty after rain?
A car that develops a damp smell after rainfall deserves closer attention.
Check the passenger and driver footwells, the rear carpet and the boot. Remove the mats and feel for unusual dampness. Look for condensation, water marks or moisture around seals.
Possible sources include damaged door or window seals, blocked drainage channels or other water-entry points.
If you find standing water, recurring wet carpet or visible mould, don’t assume an ordinary interior detail will resolve the issue.
Have the source of the water investigated first.
Mould can develop in persistently damp materials. NSW Health advises that controlling moisture and thoroughly drying affected materials are essential. Porous materials such as carpet may require professional cleaning or replacement.
If there is substantial visible mould, avoid disturbing it or vacuuming it with an ordinary household vacuum. Arrange appropriate specialist advice, particularly if someone using the vehicle has asthma or another respiratory condition.
The correct order is to fix the moisture problem, assess the affected materials, and then clean and dry the interior.
5. Will a professional car detail remove bad smells?
Professional interior detailing can help with many everyday odours, especially those associated with dirt, food spills, pet hair and contaminated upholstery.
However, the result depends on the cause, the materials affected and the type of cleaning included in the service.
For example:
The problem
What may be needed
General dirt and food crumbs
Thorough interior vacuuming and surface cleaning
Spilled drinks in fabric or carpet
Appropriate upholstery cleaning and, where suitable, extraction
Pet hair and everyday pet odour
Detailed vacuuming and cleaning of affected surfaces
Heavy cigarette smoke
More extensive cleaning and potentially specialist treatment
Wet carpet or recurring mould
Leak repair, moisture assessment and possibly specialist remediation
Smell coming from the AC vents
Cabin filter inspection or automotive AC servicing
A standard interior detail does not automatically include every treatment in this table.
Before booking, explain the problem and ask what the service covers. A detailer should be able to discuss whether the issue appears suitable for ordinary detailing or needs a different type of specialist.
At Rear Biased, we offer our Deep Detail service for customers looking for a more thorough vehicle clean in Sydney.
If your car has a stubborn smell, tell us where you notice it, what might have caused it and whether any parts of the interior are wet. We can discuss the condition of your vehicle and the appropriate next step before you book.
Once you’ve addressed the cause, a few habits can make the interior easier to maintain.
Remove rubbish regularly. Don’t leave food packaging, cups or takeaway containers under the seats.
Clean spills promptly. Blot up liquid before it has time to spread. Use a cleaner suitable for the affected material and dry it thoroughly.
Keep removable mats clean. Mats collect water, sand, dirt and whatever comes in on your shoes.
Look after pet areas. Wash removable covers and blankets, and vacuum accumulated hair before it becomes embedded in the upholstery.
Check for moisture after heavy rain. If the carpet or boot repeatedly gets wet, investigate the cause rather than continually drying the surface.
Maintain the cabin air filter. Follow your vehicle manufacturer’s replacement schedule. If unpleasant smells come from the vents, have the ventilation system checked.
Avoid relying on fragrance. An air freshener can make a clean car smell pleasant, but it isn’t a substitute for removing contaminated material or fixing a leak.
Why does my car smell bad even after a deep clean?
The original source may still be present. A spill might have reached the padding beneath the upholstery, moisture could be trapped under the carpet, or the smell may be coming from the air-conditioning system. The next step is to identify the cause rather than repeat the same cleaning process.
Can baking soda remove car smells?
Baking soda may help with some mild odours in dry carpet or mats, but it won’t remove an underlying spill, repair a water leak or fix an air-conditioning problem. Check that the material is suitable, keep powder away from sensitive components and remove it thoroughly. It shouldn’t replace proper cleaning.
How do I get a wet dog smell out of my car?
Remove and wash any removable pet bedding or seat covers. Vacuum the seats, carpets and boot, paying attention to trapped hair. Clean affected fabric with a suitable automotive product and allow it to dry fully. If the smell persists, deeper upholstery cleaning may be necessary.
Why does my car smell worse when I turn on the AC?
A smell that appears mainly through the vents may be associated with a dirty cabin air filter, moisture around the evaporator or another ventilation issue. Have the filter and system inspected. A surface interior clean won’t fix a mechanical or internal AC problem.
Can car detailing completely remove cigarette smoke smell?
It can reduce smoke-related odours, but the outcome depends on how extensively the interior is contaminated. Smoke residue may be present across multiple surfaces and in areas that are difficult to access. Heavily affected vehicles may need specialist treatment, and complete removal isn’t guaranteed.
Should I detail my car before selling it?
Cleaning a car before listing it can improve its presentation and help prospective buyers inspect the interior. However, if the vehicle has a persistent smell, identify and address the underlying issue rather than simply masking it. A recurring damp or chemical smell may need further investigation.
Need help with your car’s interior in Sydney?
Sometimes a regular vacuum and wipe-down are all a car needs. Other times, the seats, carpets and hard-to-reach areas need more attention.
If you’re dealing with stubborn dirt, neglected upholstery or an interior that needs a proper refresh, get in touch with Rear Biased.
Tell us about your vehicle and what you’d like cleaned. If there’s a particular smell or stain you’re concerned about, include that in your enquiry.
How to Clean Your Car Inside and Out: A Complete Guide for Sydney Drivers
Keeping your car clean is about more than making it look good. Dust, food crumbs, road grime and everyday dirt can accumulate in places you rarely notice, from the gaps between your seats to the inside of your wheels.
A regular wash and vacuum help, but giving your car a thorough clean requires a little more attention.
Whether you drive a small hatchback, a family SUV or a daily commuter, knowing how to properly clean your car can help maintain its appearance and make it a more pleasant place to spend time.
In this guide, we’ll explain how to clean your car inside and out, including the seats, carpets, dashboard, wheels and exterior paintwork. You’ll also learn which cleaning mistakes to avoid, how often to clean your vehicle and when professional car detailing might be worth considering.
What is the best way to clean a car inside and out?
The best approach is to work systematically, starting with the interior before moving to the exterior.
Remove rubbish and loose items, vacuum the seats and carpets, clean the upholstery and interior surfaces, and finish with the windows. Then clean the wheels using separate equipment, rinse the exterior, wash the bodywork and dry it with a clean microfibre towel.
The key is to remove loose dirt before wiping or scrubbing. Otherwise, you risk dragging grit across delicate surfaces and causing scratches.
Here’s how to do the whole job properly.
1. Gather the right car-cleaning equipment
You don’t need an expensive collection of products to clean your car at home.
Start with the basics:
A vacuum cleaner with a crevice attachment
Clean microfibre cloths
A suitable automotive interior cleaner
Fabric or leather cleaner, depending on your seats
A soft detailing brush
Car wash shampoo and two buckets
A microfibre wash mitt
A dedicated wheel brush and compatible wheel cleaner
A large microfibre drying towel
Keep your wheel-cleaning equipment separate from the cloths and mitts used on your paintwork. Brake dust and other contaminants can contain abrasive particles.
Also, avoid assuming that one cleaning product is suitable for every surface. A cleaner designed for hard plastic may not be safe for leather, fabric or an infotainment screen.
Always check your vehicle’s owner’s manual and the cleaning product’s instructions before treating unfamiliar materials.
2. Remove rubbish and prepare the interior
Before using the vacuum, remove loose items from the cabin.
Check the door pockets, cup holders, centre console, underneath the seats and boot. These areas often collect rubbish and small debris that get overlooked during a quick clean.
Next, remove your floor mats and shake out any loose dirt outdoors.
Starting with an empty interior makes it much easier to clean thoroughly, particularly around the seats and footwells.
If you notice damp carpets or an unpleasant smell, investigate the source before applying cleaning products or air fresheners. Covering up an odour won’t solve an underlying moisture problem.
3. Vacuum the seats, carpets and hard-to-reach areas
Vacuuming removes loose dirt before you begin cleaning the upholstery and other interior surfaces.
Start with the seats and work down towards the floor.
Use a crevice attachment to reach between the seats and centre console, around seat rails and along carpet edges. These narrow spaces tend to collect crumbs, sand and other debris.
For fabric seats, vacuum gently across the main surfaces and seams. For leather or synthetic leather, remove loose grit before wiping the material.
When cleaning carpets, move the vacuum slowly over heavily soiled sections. Repeat the process if necessary rather than trying to remove everything in a single pass.
How do you clean dirty car floor mats?
The correct method depends on the mat material.
For rubber mats, remove them from the vehicle, shake out loose debris and clean them with a suitable product. Rinse according to the product instructions and allow them to dry completely.
For carpet mats, vacuum thoroughly before treating any stains with a compatible fabric cleaner.
Avoid soaking carpet mats unnecessarily. If you’re using a wet-cleaning method, allow enough time for them to dry.
When reinstalling the driver’s mat, make sure it is correctly secured and cannot interfere with the pedals.
4. Clean your car seats without damaging the upholstery
Your seats are exposed to everyday dirt, spills, body oils and general wear.
However, cleaning them incorrectly can leave water marks or potentially damage the material.
The first step is to identify whether your seats are fabric, leather, synthetic leather or another specialised upholstery material.
How to clean fabric car seats
For ordinary fabric upholstery, follow these steps:
Vacuum thoroughly to remove loose dirt and crumbs.
Select a suitable automotive fabric cleaner.
Test the product on a small, inconspicuous area.
Apply it according to the manufacturer’s instructions.
Gently work the affected area with a soft cloth or suitable brush.
Remove the cleaning residue as directed and allow the seat to dry fully.
Avoid saturating the fabric. Excess moisture can penetrate the padding, increase drying time and contribute to water marks or persistent dampness.
For stubborn stains, don’t automatically scrub harder. The appropriate cleaning method depends on the stain and material, and some stains cannot be removed completely.
How to clean leather car seats
For leather seats, begin by removing loose dust and grit with a vacuum or soft cloth.
Use a cleaning product compatible with your specific leather finish and gently wipe the surface.
Avoid harsh household chemicals, excessive moisture and abrasive brushes.
Some materials, including suede-like upholstery and perforated leather, require particular care. Always follow the vehicle manufacturer’s guidance.
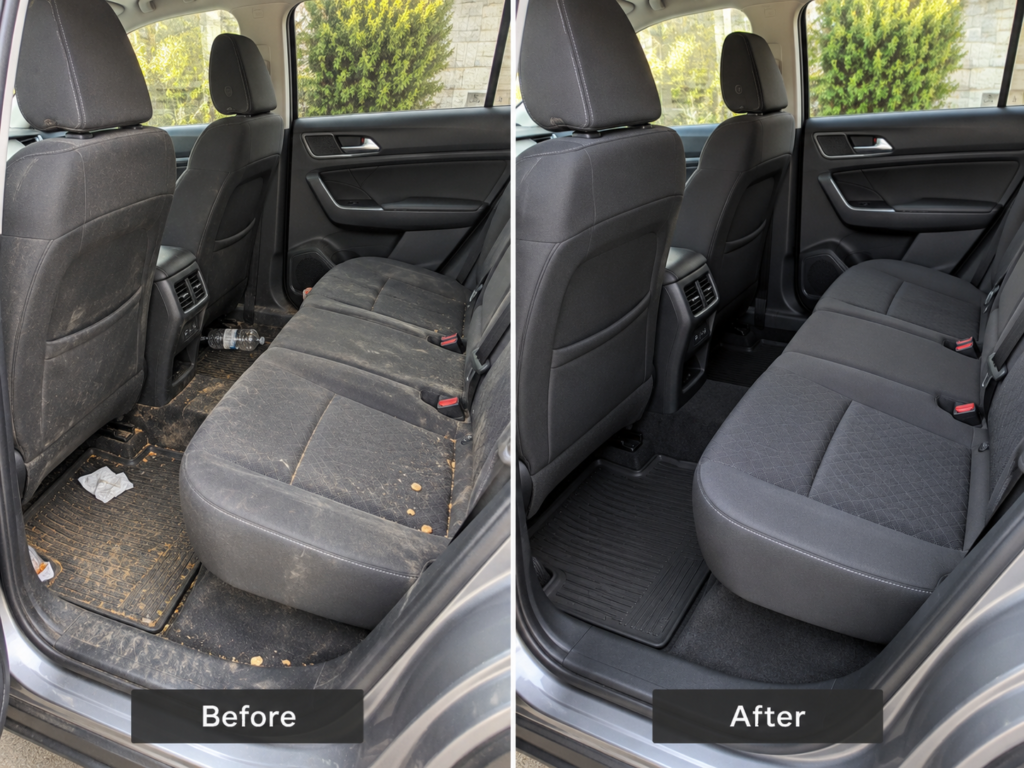
5. Clean the back seats and rear passenger area
The rear passenger area often needs more attention than a quick vacuum.
If you regularly transport children or pets, check underneath the front seats, around the seatbelt buckles and in the gaps between the rear seat cushions.
Remove loose rubbish and vacuum the seat surfaces, floor mats and accessible carpet.
Pay attention to the backs of the front seats, rear cup holders, door pockets and any accessible storage compartments.
If you have child restraints installed, follow the restraint manufacturer’s instructions before removing, cleaning around or reinstalling them.
Once you’ve finished vacuuming, wipe suitable hard surfaces with a compatible interior cleaner and a clean microfibre cloth.
For fabric upholstery, treat stains using the same careful method described above.
6. Clean the dashboard, steering wheel and centre console
Your dashboard and centre console collect dust, fingerprints and grime from everyday use.
Start by wiping away loose dust with a clean microfibre cloth.
For suitable hard surfaces, apply a compatible interior cleaner to the cloth rather than spraying directly onto switches, vents or other openings.
Gently clean the dashboard, centre console and door trims.
A soft detailing brush can help remove dust from air vents and narrow gaps. Collect the loosened debris using a vacuum or cloth.
How should you clean a car touchscreen?
Infotainment screens can have delicate protective coatings.
Follow your vehicle manufacturer’s instructions and use a soft, clean microfibre cloth.
Avoid abrasive materials, harsh cleaning chemicals and spraying liquid directly onto the screen.
What should you avoid when cleaning the steering wheel?
Don’t apply slippery dressings to the steering wheel, gear selector or pedals.
These are important driver-contact surfaces, so they should be clean and dry without leaving a slippery residue.
For seatbelts, follow your owner’s manual and avoid harsh chemicals that could damage the webbing.
7. Clean the interior windows and mirrors
Dirty interior glass can create glare, particularly when sunlight hits the windscreen at certain angles.
Use a suitable automotive glass cleaner and a clean microfibre cloth to remove fingerprints, dust and accumulated film.
Clean the inside of the windscreen, side windows and rear glass, then buff away any remaining streaks with a second cloth.
If your windows are tinted, check the tint manufacturer’s care instructions. RACV advises avoiding ammonia-based cleaners on tinted windows.
Clean your interior glass towards the end of the process so that dust or overspray from other cleaning tasks doesn’t settle on it again.
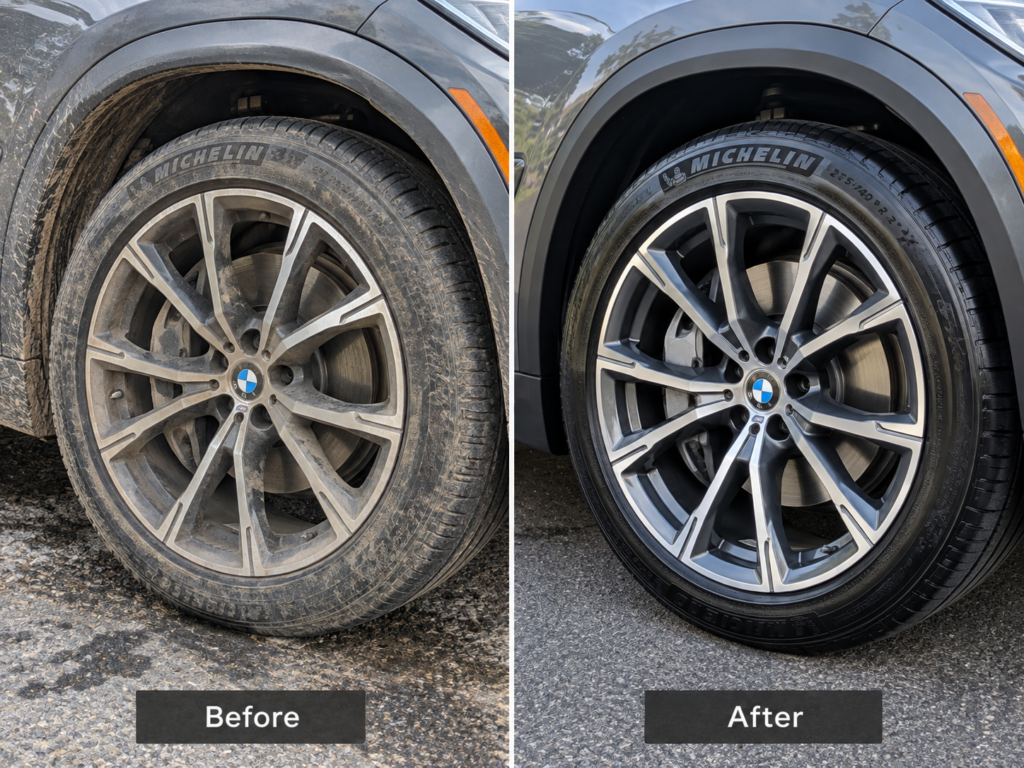
8. Clean the wheels and tyres before washing the bodywork
Your wheels are exposed to road grime, brake dust and other contaminants.
Cleaning them before the bodywork, using separate equipment, helps prevent wheel dirt from being transferred to the paint.
First, allow the wheels and brakes to cool.
Rinse away loose dirt, then apply a wheel cleaner compatible with your wheel’s finish.
Use a dedicated brush to gently clean the accessible wheel surfaces, paying attention to the spokes and areas around the wheel nuts.
Follow the cleaner’s recommended contact time and rinse thoroughly.
Never allow the product to dry on the wheel unless its instructions specifically permit it.
If you use tyre dressing, apply it only to suitable sidewall surfaces and keep it away from the tread and braking components.
You don’t need an excessively glossy finish. Clean wheels and evenly finished tyres can make a noticeable difference to your vehicle’s appearance.
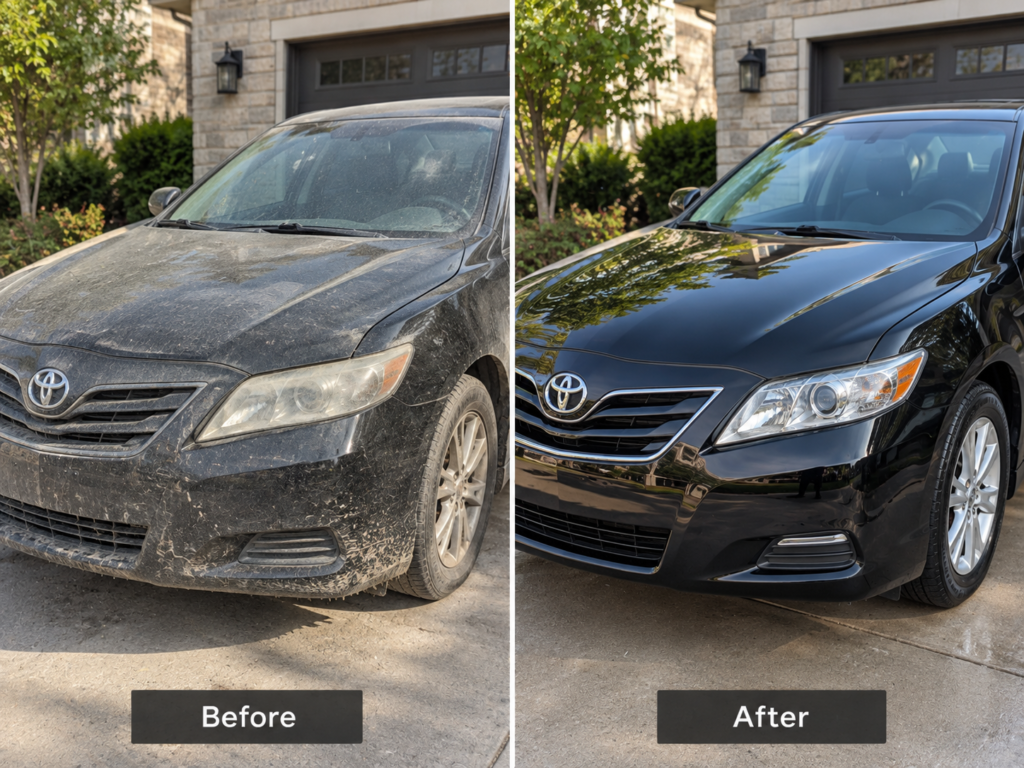
9. Wash the exterior without scratching the paint
Washing your car incorrectly can contribute to fine scratches and swirl marks.
The main risk is dragging dirt and grit across the paint during washing or drying.
To reduce that risk, follow a careful washing process.
Step 1: Park in the shade
Where possible, wash your vehicle in a shaded area after the body panels have cooled.
Washing hot panels can cause shampoo and water to dry too quickly, making streaks and water spots more difficult to avoid.
Step 2: Pre-rinse the vehicle
Rinse the entire exterior before making contact with the paint.
Pay particular attention to the lower doors, wheel arches and other areas where road grime accumulates.
This helps remove loose dirt that could otherwise become trapped in your wash mitt.
If you’re using a pressure washer, follow the equipment and vehicle manufacturers’ instructions and maintain a safe distance from sensitive surfaces.
Step 3: Use the two-bucket washing method
Fill one bucket with car shampoo diluted according to its instructions.
Fill the second bucket with clean water.
Use the shampoo bucket to load your wash mitt, then gently wash a small section of the vehicle.
Rinse the dirty mitt in the clean-water bucket before returning it to the shampoo.
This helps reduce the amount of collected grit transferred back onto the paint.
Australian motoring organisations, including RACV and RAC WA, recommend the two-bucket method as part of safer car washing.
Step 4: Wash from top to bottom
Start with the roof and work down through the glass, bonnet, upper body panels and lower sections.
The lower areas generally collect more dirt, so leave them until later.
Wash one manageable section at a time and rinse before the shampoo dries.
Avoid excessive pressure. If stubborn contamination doesn’t come away with normal washing, use a suitable removal method rather than scrubbing aggressively.
Step 5: Rinse and dry the car
After washing, rinse off all shampoo residue.
Use a clean, soft microfibre drying towel to remove the remaining water.
Gently dry the panels and check around mirrors, handles and other areas where water can remain trapped.
Avoid using dirty cloths or towels that have been dropped on the ground.
Can you use dishwashing liquid to wash your car?
A dedicated automotive shampoo is generally a better choice for routine washing.
Dishwashing liquid is formulated for household cleaning and may remove or compromise existing wax and other protective products.
Choose a car shampoo compatible with your vehicle’s finish and follow its dilution instructions.
10. Clean the boot, door jambs and overlooked areas
Before calling the job finished, check the places that are easy to forget.
Vacuum the boot and clean any removable boot liner according to its material.
Use a separate cloth to wipe suitable door jamb surfaces and remove accumulated dirt.
You can also check the accessible areas around the tailgate handle, rear number plate, rubber seals and exterior trim.
Avoid applying cleaning products to electrical connections or other areas where your vehicle manufacturer advises against them.
For vehicles frequently driven through muddy conditions, inspect the lower body panels and wheel arches for built-up grime.
Once everything is clean, check that all treated surfaces are dry and free of excess product.
11. Remove bird droppings and other stubborn contaminants promptly
Bird droppings, tree sap and other contaminants can become more difficult to remove if they’re left on the paint.
Some may also damage the finish over time.
Avoid scraping hardened deposits with sharp objects or scrubbing them aggressively.
Instead, soften the contamination using a suitable automotive cleaning product and remove it carefully with a clean cloth.
If it doesn’t come away easily, use a compatible product specifically designed for that type of contamination.
Remember that cleaning and paint correction are different processes. Washing removes dirt, but it won’t normally eliminate existing scratches, clear-coat damage or other physical defects.
12. How often should you clean your car?
There’s no single cleaning schedule suitable for every vehicle.
How quickly your car gets dirty depends on your driving habits, parking conditions and how you use it.
As a practical starting point, consider this routine:
Every week: Remove rubbish, check for spills and wipe frequently touched interior surfaces.
Every one to two weeks: Vacuum frequently used areas and clean visibly dirty glass.
Every two to four weeks: Assess whether the exterior needs washing.
Every few months: Inspect the seats, carpets, wheels and overlooked areas for deeper cleaning.
These are general maintenance suggestions rather than fixed requirements.
A vehicle regularly exposed to dust, mud, bird droppings or coastal conditions may need more frequent attention.
Deal with spills and potentially damaging contamination as soon as practical rather than waiting for your next scheduled clean.
13. Common car-cleaning mistakes to avoid
Even with the right equipment, certain habits can make cleaning less effective or damage your vehicle.
Washing dusty paint without rinsing first: Loose grit can become trapped in your wash mitt and scratch the finish.
Using the same cloth for wheels and paint: Brake dust and wheel dirt can contain abrasive particles. Keep dedicated wheel-cleaning equipment.
Scrubbing fabric stains too aggressively: This can damage upholstery fibres or spread a stain. Use a suitable cleaner and gentle technique.
Soaking seats and carpets: Excess moisture can extend drying time and contribute to persistent dampness.
Spraying cleaners directly into switches: Apply compatible cleaning products to a cloth to reduce the risk of liquid entering sensitive components.
Washing hot body panels: Shampoo and water may dry too quickly and leave residue or water spots.
Using slippery dressings on driver-contact surfaces: Keep the steering wheel, gear selector and pedals clean and dry.
For Sydney drivers, it’s also important to consider where car-washing wastewater goes.
The NSW Government recommends washing cars on grass or gravel, where appropriate, or using a car wash to help prevent polluted runoff entering stormwater drains. Follow any applicable local requirements and water restrictions.
14. How long does it take to clean a car inside and out?
The time required depends on the vehicle’s size, condition and the level of cleaning you want to achieve.
A light maintenance clean might take around an hour, while a more thorough interior and exterior clean could take several hours.
For a moderately dirty vehicle, you might allow approximately 20–40 minutes for vacuuming, 20–40 minutes for interior surfaces and glass, 15–30 minutes for wheels, and 30–60 minutes for washing and drying the exterior.
Additional preparation and finishing time may also be needed.
These are planning estimates, not guaranteed completion times. Heavy staining, embedded dirt and larger vehicles may require substantially more work.
If you’ve used wet upholstery or carpet-cleaning methods, allow additional time for the materials to dry completely.
15. Is professional car detailing worth it?
Regular DIY cleaning is a practical way to maintain your vehicle between more comprehensive cleans.
However, professional detailing may be useful when ordinary maintenance isn’t enough.
Consider a professional detail when dirt is embedded in carpets or upholstery, grime has accumulated in hard-to-reach areas, or you want a more thorough interior and exterior refresh.
It can also be worth considering when preparing a vehicle for sale or when you don’t have the time, equipment or suitable space to complete the job yourself.
What’s the difference between a car wash and car detailing?
A standard car wash generally focuses on removing exterior dirt.
Car detailing is typically a more comprehensive process that may include extensive interior cleaning, attention to smaller areas and additional exterior treatments.
However, not every detailing package includes the same work.
Before booking, confirm whether the service covers the interior, exterior, upholstery, wheels or any specialised treatments you require.
Services such as paint correction and ceramic coating are separate processes and shouldn’t be assumed to be included in a standard detail.
Professional car detailing in Sydney — Rear Biased
A quick wash and vacuum can make a difference, but a more thorough detail can help refresh areas that regular maintenance often misses.
At Rear Biased, we provide car detailing services for Sydney drivers looking to give their vehicles more attention.
Our Deep Detail package focuses on refreshing your vehicle’s interior and exterior, with careful attention to its overall presentation.
Whether your car has accumulated dirt from daily commuting, family use or months of everyday wear, contact us to discuss its condition and the level of cleaning it requires.
Frequently asked questions about cleaning your car
What is the correct order to clean a car?
A practical sequence is to remove rubbish, vacuum the interior, clean the upholstery and hard surfaces, finish the interior glass, clean the wheels with separate equipment, and then rinse, wash and dry the exterior.
The exact order can vary, but keeping dirty equipment away from clean or delicate surfaces is essential.
Can I detail my car at home?
Yes. Many routine detailing tasks can be performed at home with appropriate equipment, compatible cleaning products and a suitable washing area.
However, heavily stained upholstery, specialised materials and paint defects may require additional expertise or equipment.
How do you clean a car interior like a professional?
Work systematically rather than focusing only on visible dirt.
Remove belongings, vacuum the seats and carpets, clean compatible interior surfaces, pay attention to seams and narrow gaps, treat suitable upholstery stains, and finish with the interior glass.
Use dedicated cloths and appropriate products for different materials, and avoid excessive moisture.
How do you get stains out of car seats?
First, identify the upholstery material and the type of stain.
Vacuum loose dirt, test a compatible upholstery cleaner in an inconspicuous area, and follow the product’s instructions.
Avoid aggressive scrubbing or soaking the seat. Some stains may require specialist treatment and cannot always be completely removed.
How do you get rid of bad smells inside a car?
Start by removing rubbish and checking for spills, damp carpets and trapped debris.
Vacuum the interior and clean affected surfaces using methods appropriate for their materials.
If the smell persists, investigate the underlying cause before applying an air freshener.
How often should you wash your car in Sydney?
The appropriate frequency depends on where you park, how often you drive and the contaminants your vehicle encounters.
For many vehicles, checking whether an exterior wash is needed every two to four weeks is a reasonable maintenance starting point.
Remove bird droppings, tree sap and other potentially damaging contaminants promptly.
Does car detailing remove scratches?
Ordinary car cleaning removes dirt but doesn’t repair physical scratches.
Certain light paint defects may be improved through suitable polishing or paint-correction techniques. Deeper scratches may require repair.
Always confirm whether a detailing service includes paint correction rather than assuming it is part of the package.
Should I clean my car before selling it?
A thorough clean can help present your vehicle to potential buyers.
Pay attention to the seats, carpets, dashboard, glass, wheels and exterior paintwork.
Address any significant mechanical or cosmetic issues separately rather than relying on detailing to conceal them.
Further reading
For additional car-care advice, refer to these resources:
Car Wash vs Car Detailing in Sydney: What Does Your Car Actually Need?
A car can come out of a wash looking clean and still not feel properly clean.
The paint might look dull in direct sunlight. Brake dust may still be sitting around the wheels. There might be crumbs between the seats, stains in the carpet, grime around the cup holders or dirt sitting in areas a quick clean never reaches.
That doesn’t necessarily mean the wash was bad.
It might simply mean your car needs a different level of cleaning.
Car Wash vs Car Detailing: The Short Answer
A car wash is primarily maintenance. Car detailing is a deeper cleaning and reconditioning process.
If your car has a layer of dust, light road grime or normal day-to-day dirt, a good wash may be all it needs.
If you are dealing with built-up interior grime, stains, neglected areas, contaminants that remain after washing or a car that simply hasn’t had a proper clean in a long time, detailing may make more sense.
And if the problem is scratches, swirl marks, damaged paint or dents, you may need something beyond normal detailing altogether.
The important distinction is that “detailing” does not automatically mean paint correction, polishing or ceramic coating. Different detailers offer different packages, so you should always check exactly what is included before booking.
What you’re seeing
What may make sense
Dust, light dirt and normal road grime
Maintenance wash
Dirty wheels and exterior buildup
Thorough exterior wash/detail
Crumbs, dust and light interior dirt
Interior clean
Significant interior buildup or stains
Deeper interior detail
Paint still feels rough after washing
Paint decontamination may be worth assessing
Fine swirl marks or dull paint
Polishing or paint correction may be required
Deep scratches, dents or failing paint
Detailing alone is unlikely to fix it
That last part matters because paying for the wrong service doesn’t help you or the car.
What Does a Car Wash Actually Do?
A proper car wash is not something to dismiss.
Regular washing is an important part of maintaining a vehicle because it removes dirt, grime and other contaminants sitting on the exterior.
RACV recommends regular washing as part of protecting automotive paintwork and advises using products intended for vehicle paint rather than abrasive household cleaners.
A typical exterior wash may include a pre-rinse, wheel cleaning, washing the body, rinsing and drying.
Exactly what is included will depend on the business or wash package.
If the vehicle is already reasonably well maintained, that might be everything it needs.
The problem is when dirt is no longer only sitting loosely on the surface.
What Makes Car Detailing Different?
Detailing generally involves working through the vehicle more thoroughly rather than simply trying to make the visible surfaces clean as quickly as possible.
On an interior, that could mean working around seat rails, vents, cup holders, door trims, mats, carpet, storage compartments and other areas where debris gradually accumulates.
On an exterior, depending on the package, it might involve more detailed wheel cleaning, door jambs, trims, glass and removal of contamination that remains after an ordinary wash.
However, there is no universal detailing package.
An “interior detail”, “full detail”, “deep detail” and “paint correction” can mean very different things between businesses.
Compare the actual process and inclusions, not just the word “detail”.
How Do You Know What Your Car Actually Needs?
Instead of deciding based on how many months have passed, look at the condition of the car.
If the car is simply dusty or lightly dirty
Start with a proper wash.
There is little reason to pay for an intensive detail every time your daily driver gets dusty.
Regular maintenance prevents small amounts of dirt from becoming months of buildup.
If the interior looks clean until you look closely
Look between the seats.
Move the mats.
Check the seat rails, cup holders, door pockets and edges of the centre console.
These areas are a better indication of the actual condition of the interior than the dashboard alone.
If most of the cabin is clean and you’re only seeing loose dirt, a vacuum and maintenance clean may be enough.
If grime, spills, stains and debris have accumulated throughout the cabin, a deeper interior detail starts making more sense.
If the paint still feels rough after washing
A clean vehicle doesn’t necessarily mean the paint surface is completely free from contamination.
Tar, tree sap and other contaminants can remain after normal washing.
RACV specifically identifies substances such as tar, tree sap and bird droppings as contaminants that should be removed carefully rather than aggressively scrubbed from the paint.
If the paint doesn’t feel right after washing, don’t automatically start aggressively polishing or claying it yourself.
First establish what is actually on the surface.
If you can see circular marks in direct sunlight
Those may be swirl marks.
Swirl marks are fine scratches in the clear coat and are particularly noticeable under strong light.
RACV notes that repeated friction with trapped dirt or debris is a common cause. Dirty wash equipment, wiping dusty paint and rotating-brush automatic washes can all contribute.
At this point, another normal wash won’t remove the marks because the issue is no longer simply dirt sitting on top of the paint.
Depending on their severity, polishing or professional paint correction may be needed.
Can a Detail Remove Scratches?
Not necessarily.
This is one of the most important things to understand before booking any detailing service.
Washing removes dirt.
Decontamination removes certain material bonded to the surface.
Polishing works on fine defects in the paint’s upper surface.
Paint repair deals with damage that polishing cannot safely remove.
These are not interchangeable.
RACV explains that many light swirl marks sit within the clear coat and may be reduced through polishing. Deeper scratches can extend further through the paint system and may require professional paint repair instead.
So if you can see a significant scratch, don’t assume a standard “full detail” will make it disappear.
A good question to ask before booking is:
“Does this service include paint correction, or is it cleaning only?”
That one question can prevent a lot of disappointment.
What Detailing Cannot Fix
A good detail can improve the cleanliness and presentation of a vehicle, but there are limits.
Detailing does not automatically repair dents.
It cannot replace missing or peeling paint.
It cannot make every deep scratch disappear.
It cannot reverse badly damaged upholstery.
It cannot repair cracked trim.
And it does not correct mechanical problems.
This distinction matters because photos online can sometimes make detailing appear capable of completely restoring any vehicle.
Some transformations genuinely are dramatic.
Others require repair work in addition to detailing.
Understanding the difference helps you book the right service and have realistic expectations about the result.
Are Automatic Car Washes Bad for Your Paint?
The answer needs a little more nuance than simply saying “yes”.
Not every automatic wash uses the same process.
RACV identifies rotating-brush automatic washes as one potential cause of swirl marks because dirt and friction can be introduced across the paint surface. It also notes that touchless automatic washes generally reduce this particular contact risk, although they may not clean as thoroughly.
So the more useful distinction is:
Brush wash vs touchless wash vs careful hand wash.
If preserving the finish of the paint matters to you, the washing method, cleanliness of the equipment and amount of physical contact with dirty paint all matter.
Even hand washing can cause marks if dirty equipment is repeatedly dragged across the surface.
It’s the process that matters, not simply whether a human or a machine is doing it.
Don’t Dry-Wipe a Dusty Car
This is one of the simplest habits worth changing.
You notice dust on a black bonnet.
You grab a microfibre cloth.
You wipe it off.
The car looks cleaner — but the dust between the cloth and paint can act as an abrasive.
RACV advises against wiping dust from dry paint and recommends rinsing away loose contamination before making contact with the surface.
If the car is dusty, washing it properly is safer than repeatedly dry-wiping the paint to keep it looking clean.
Bird Droppings and Tree Sap: Don’t Leave Them Until Your Next Detail
You don’t need to wait for your next full detail to deal with bird droppings or tree sap.
RACV recommends removing them as soon as practicable because leaving them on the surface can damage paint. Its guidance recommends softening contamination with water before gently removing it rather than aggressively scrubbing.
NRMA similarly warns that tree sap and bird droppings can damage automotive paint and recommends being mindful of where vehicles are parked when possible.
The useful lesson here isn’t “detail your car more often.”
It’s:
Deal with potentially damaging contamination when you notice it.
Waiting months for the next professional service doesn’t make sense if something harmful is sitting on the paint today.
How Often Should You Detail Your Car in Sydney?
There isn’t one schedule that makes sense for every Sydney driver.
Consider two cars.
One is a weekend car stored in a garage, rarely carries passengers and is regularly washed.
The other is a daily driver parked outside, used for work, regularly carries passengers and spends time under trees.
Putting both cars on the same detailing schedule makes little sense.
Instead, base the decision on the car’s use and condition.
A vehicle may need more frequent attention when it is regularly parked outside, frequently driven, used for work, carries children or pets, has regular food or drink inside, or is exposed to more environmental contamination.
A lightly used and well-maintained car may need far less intervention.
Rather than asking:
“Has it been three months since my last detail?”
Ask:
“Is there a problem my normal maintenance clean is no longer solving?”
That’s a much better reason to book a deeper service.
Is a Car Detail Worth It Before Selling?
It can be worthwhile if the car’s presentation needs attention.
A prospective buyer is going to see the seats, carpet, wheels, glass, paint and general condition almost immediately.
Cleaning those areas can make the car easier to present and photograph.
What we wouldn’t claim is that detailing automatically increases the amount somebody will pay for the car.
The sale price depends on far more than cleanliness: model, age, kilometres, maintenance history, mechanical condition, market demand and other factors all matter.
Think of pre-sale detailing primarily as presentation, not as a guaranteed financial return.
How to Compare Car Detailing Services
Don’t compare detailers using the package name alone.
A $150 “detail” and a $350 “detail” might not even be attempting to do the same job.
Before booking, establish whether the service covers the interior, exterior or both.
Check whether stain treatment is included.
Check whether paint decontamination is included.
If polishing is advertised, ask what type.
If you want scratches or swirl marks improved, ask specifically whether paint correction is part of the service.
And if your vehicle is unusually dirty, send photos before booking when possible.
The more accurately the condition is understood beforehand, the easier it is to choose a service that actually matches the problem.
Wash, Detail or Paint Correction? A Simple Rule
If the problem is dirt, start with cleaning.
If the problem is deep buildup, consider detailing.
If the problem is paint defects, investigate polishing or paint correction.
If the problem is physical damage, you may need a repairer rather than a detailer.
You don’t always need the most expensive service.
You need the service that solves the actual problem.
Car Detailing in Sydney With Rear Biased
At Rear Biased, we like cars, and that’s the reason the business exists.
For us, detailing isn’t just about making something look shiny in an after photo. The areas that usually make the biggest difference are often the ones people don’t notice until they’re properly cleaned.
If your car has reached the point where another quick wash isn’t solving the problem, our Deep Detail is the place to start.
If you’re not sure what your car needs, send us some details about the vehicle and its current condition before booking.
That gives us a much better starting point than simply choosing the biggest package because it sounds better.
What is the difference between a car wash and car detailing?
A car wash primarily removes normal surface dirt and road grime. Detailing is generally a more thorough process that may address deeper interior buildup, exterior contamination and areas that aren’t normally covered during routine washing. Exact inclusions vary between providers.
Do I need a car detail or just a wash?
If your vehicle is mainly dusty or lightly dirty, a good maintenance wash may be enough. If stains, built-up grime, neglected areas or contamination remain after normal cleaning, a deeper detail may be more appropriate.
Does car detailing remove scratches?
Not automatically. Cleaning does not remove scratches. Some shallow clear-coat defects may be improved through polishing or paint correction, while deeper damage may require professional paint repair.
Can car detailing remove swirl marks?
A standard cleaning detail may not. Light swirl marks can sometimes be reduced through polishing because they affect the clear coat, but the correct approach depends on their depth and the condition of the paint.
Are automatic car washes bad for cars?
It depends on the wash system. Brush-style automatic washes can contribute to swirl marks through physical contact and trapped debris. Touchless systems reduce that contact but may not clean as thoroughly. Careful washing technique matters regardless of the method used.
How often should I detail my car?
There is no universal interval. Consider where the vehicle is stored, how often it is driven, how the interior is used, how well it is maintained between details and its current condition.
Should I detail my car before selling it?
Detailing can improve how the vehicle presents to prospective buyers and in listing photos. It should not, however, be treated as a guarantee that the car will sell for a higher price.
Sources and Further Reading
RACV — “How to remove swirl marks from your car” Published January 2026. Covers swirl marks, washing-related paint damage, polishing and safe maintenance practices.
RACV — “How to protect your car paintwork in Australia” Published February 2026. Covers regular washing, Australian environmental exposure, bird droppings, tree sap, waxes, sealants and coatings.
RACV — “How to repair and remove scratches from your car’s paintwork” Explains the difference between light surface marks and deeper paint damage, along with washing practices that can contribute to scratches.
RACV — “How to wash, clean, and detail your car” Provides practical guidance for exterior washing, interior cleaning, contamination removal and frequently overlooked areas.
NRMA Insurance — “No garage? Here’s how to help protect your car” Updated December 2024. Discusses outdoor parking, tree sap, bird droppings and environmental exposure.